This section explains how to create a LINE Official Account and configure the basic settings needed for LINE ID linking.
The following items are required for the initial setup of CRM PLUS on LINE:
This page guides you through the setup process to ensure that both the LINE Login channel and Messaging API channel are created under the same Provider.
If these channels have already been created, please make sure that you have access permissions to manage them.
Create an account from the LINE Official Account service page.
If you have previously created a LINE Official Account, proceed to 2. Start Using the Messaging API.

Log in to the LINE Official Account Manager.
Open "Messaging API" from "Settings" and click "Enable Messaging API".

If you have never used LINE Business ID before, enter your developer information such as your name and email address, then click Agree to create a LINE Business ID.
⚠️ For the provider name, enter the official name of your company or organization (e.g., legal company name). Do not enter your shop or brand name. If you are an individual rather than a business entity, you may enter your shop name, brand name, or personal name.
Example: If your store name is “CRM PLUS on LINE Demo Site,” your provider name should be something like “Social PLUS Inc.”
⚠️ Once selected, a provider cannot be changed. If a provider has already been created, make sure to select the existing one.
For more details, please refer to LINE Developers|Creating a Provider.
After entering the required information, click "Agree" to proceed.

Enter your "Privacy Policy" and "Terms of Use", then click "OK".
The "Privacy Policy" is required and must be entered.

Once the Messaging API channel information is displayed, you can start using the Messaging API.
If the Messaging API has already been created, its status will be shown as "Enabled".
Make sure you have the necessary permissions on LINE Developers to access the provider where the Messaging API was created.

Log in to LINE Developers using the same account as your LINE Official Account Manager.
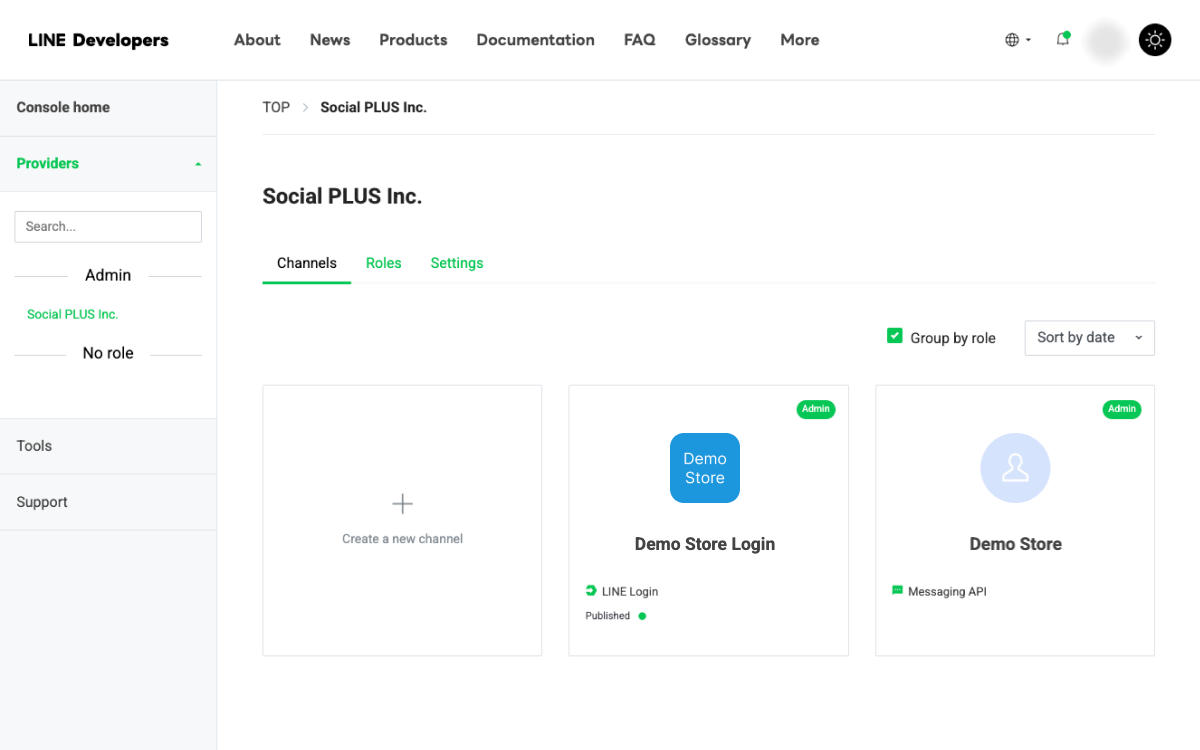
Select the provider where the Messaging API channel was created, and click "Create a new channel".

Then, click "LINE Login".

Enter the following basic channel information:
After filling out the form, check the box to agree to the "LINE Developers Agreement", and click "Create".

Once the basic channel information is displayed, the LINE Login channel has been successfully created.
When a user logs in via LINE or links their LINE ID, you can display a checkbox to let them add your LINE Official Account as a friend.
Open the "Basic settings" of the LINE Login channel, then click "Edit" next to "Linked LINE Official Account".

Select the LINE Official Account associated with your provider, and click "Update".
⚠️ Be careful to select the correct LINE Official Account that you want to link to your store.

⚠️ This setting is only required if you plan to use the LINE Login feature with Shopify Plus.
If you do not use LINE Login, you can skip this section and proceed to 3-4. Publish the LINE Login Channel.
Open the "Basic settings" of the LINE Login channel, and click "Apply" next to "Email address permission".
This application is required if you want to obtain users' email addresses when they log in via LINE.

Enter the required information and click "Save".
For the screenshot, upload an image of a screen that clearly explains to users the purpose of collecting and using their email address, such as a registration page. (See example)
Once the application is submitted, you will immediately be able to obtain users' email addresses through LINE Login.


To allow users to link their LINE ID, you need to publish the LINE Login channel.
First, click "Developing".

When the confirmation screen appears, review the details and click "Publish".

Once the status changes to "Published", the process is complete.
You’ve now finished setting up everything required for LINE ID linking using your LINE Official Account!
The following settings can be found here.
If the feature does not work as expected after setup, please refer to our Troubleshooting page (Japanese) for more information.
If you have any questions, feel free to contact our support team.
Support contact: support@socialplus.jp
Please feel free to contact us with any questions or concerns about CRM PLUS on LINE.
